A “disco planter” is not a widely recognized term, so it’s not entirely clear what you’re referring to. However, based on the words “disco” and “planter,” it could be a decorative planter with a disco or dance-themed design. Here’s a general idea of how you might use or create a “disco planter”:
- Select a Planter: Choose a planter that fits the size and type of plant you want to grow. The planter itself can be made of various materials, such as ceramic, plastic, metal, or wood.
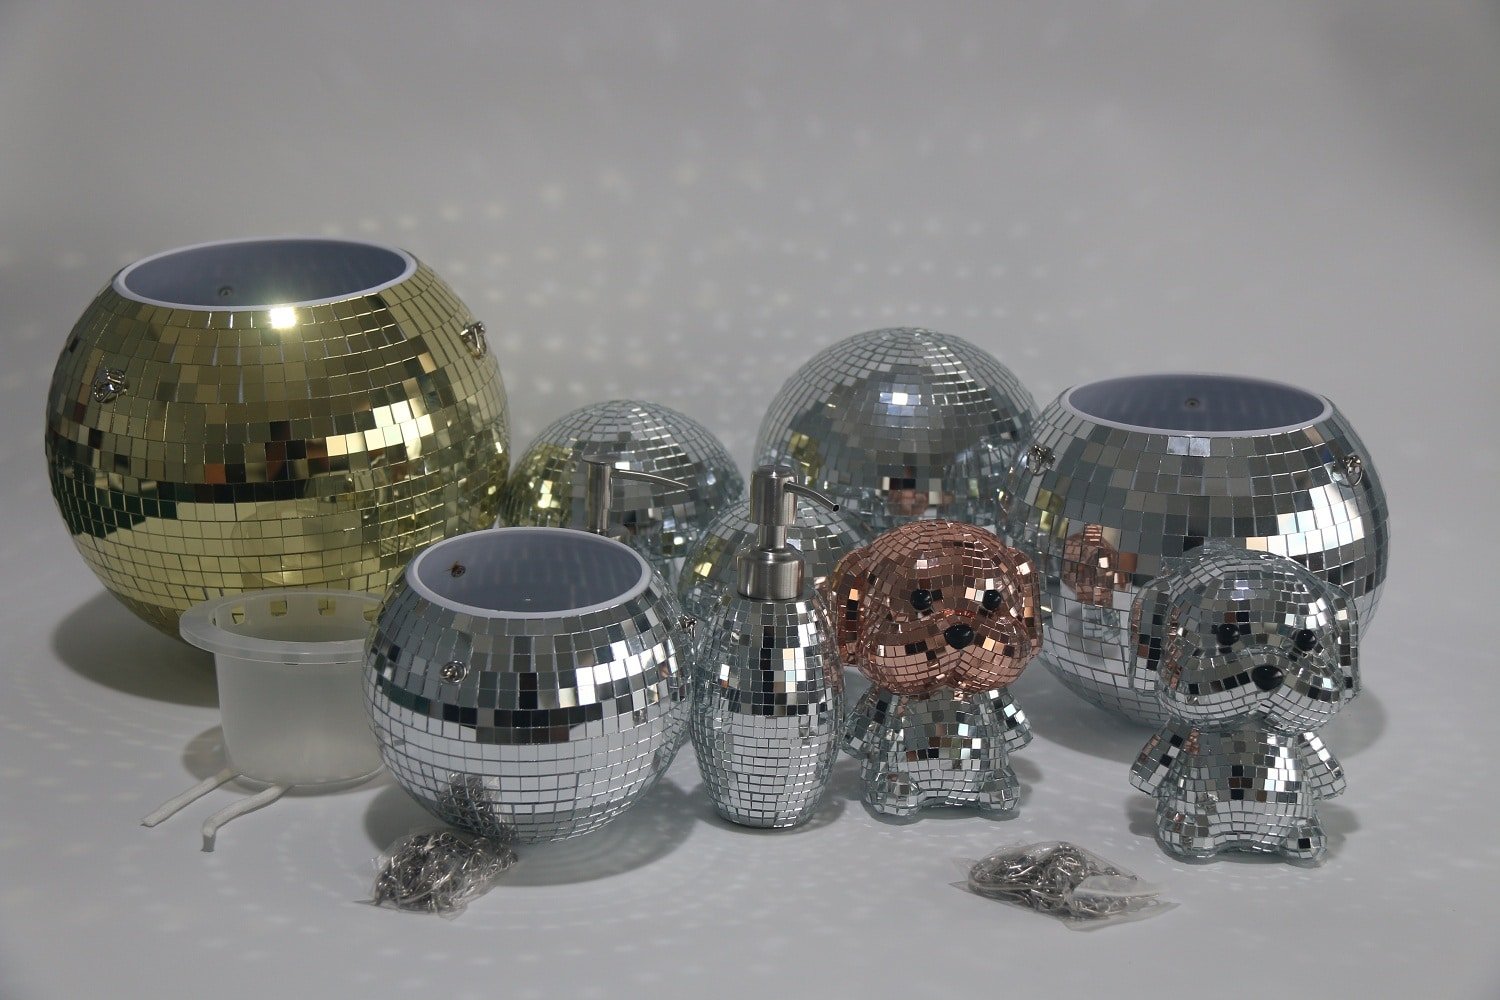
- Decorate the Planter: To give it a disco or dance-themed look, you can consider decorating the planter in the following ways:
- Paint it with disco-inspired colors like bright and reflective shades of silver, gold, or glittery colors.
- Add disco ball stickers, decals, or adhesive embellishments to the exterior of the planter.
- Apply mirror tiles, sequins, or other shiny materials to create a reflective and dynamic surface.
- Customize it with images or symbols associated with disco culture, such as disco balls, dancing silhouettes, or musical notes.
- Select Suitable Plants: Choose plants that are appropriate for the planter’s size and location. Depending on whether it’s an indoor or outdoor planter, select plants that will thrive in the available light and conditions.
- Plant Your Greenery: Fill the planter with potting soil and plant your chosen greenery. Be sure to follow the specific planting instructions for the types of plants you’ve selected.
- Maintenance: Properly care for your plants by providing them with the right amount of water, light, and nutrients.
- Display: Place your disco planter in a location where it can be enjoyed. This could be indoors as part of your home decor or outdoors in your garden, patio, or balcony.
- Enjoy the Disco Vibe: The “disco planter” can serve as a fun and decorative addition to your living space or outdoor area. It combines the beauty of plants with a disco-themed aesthetic.
How to hang a disco ball planter?
Hanging a disco planter involves suspending it from a support structure or ceiling. Here are step-by-step instructions for hanging a disco planter:
Materials You’ll Need:
- Disco planter
- Ceiling hook or hanger
- Screwdriver or drill (if necessary)
- Strong rope, chain, or wire (make sure it can support the weight of the planter)
- Ceiling anchor (if not attaching to a wooden ceiling)
- Measuring tape
- Pliers or wire cutters
- S-hook or carabiner (optional)
Steps:
- Select the Location: Choose where you want to hang your disco planter. Ensure it’s an area that receives the appropriate amount of light for the plants you plan to grow. Consider the height at which you want to hang it for both aesthetics and plant health.
- Locate Ceiling Support: If you’re hanging the planter from a ceiling, you’ll need to find a suitable ceiling joist or beam to attach the hook or hanger. You can use a stud finder to help locate the joist. If you can’t attach directly to a joist, use a ceiling anchor appropriate for your ceiling type (e.g., drywall anchor for a plasterboard ceiling).
- Install Ceiling Hook or Hanger: If attaching to a wooden ceiling joist, use a screwdriver or drill to install a sturdy ceiling hook or hanger. Make sure it’s securely fastened to the ceiling support structure.
- Measure and Cut the Suspension Material: Measure the distance from the ceiling hook to the disco planter. Add a little extra length for adjusting the height if needed. Use pliers or wire cutters to cut the rope, chain, or wire to the desired length.
- Attach the Suspension Material: Securely attach one end of the suspension material to the planter. You can use an S-hook or carabiner to make it easier to hang and adjust the planter’s height. Ensure that the attachment is secure and won’t slip.
- Hang the Planter: Lift the disco planter and hang it on the ceiling hook or hanger. Adjust the height to your preference by either tying knots in the suspension material or using adjustable hardware.
- Level the Planter: Use a level to ensure that the planter hangs evenly and isn’t crooked.
- Water and Care: After hanging, remember to water and care for your plants regularly. You may need a tray or saucer underneath the planter to catch any excess water that drips out.
- Enjoy Your Hanging Disco Planter: Your disco planter is now hanging in place, adding a unique and decorative touch to your space.